
How to take up a Hem
Please read the whole of this article before you begin.
When you are a woman of 5ft 3, it can be very difficult to buy a dress that doesn’t graze the ankles. Maxi-dresses are mean’t to cover all the legs, but sometimes you see a dress that takes your fancy and you just want a midi-length instead.
When I left school, I worked in a factory making clothes. I learned some useful skills whilst I was there, and that was to use a sewing machine and to alter jumpers, dresses and skirts etc. This post is going to show you how easy it is to take up the hem of a dress if the length is too long for you. I’m using a sewing machine, but you can hand stitch too, you’ll just need an extra bit of patience.
Step 1.  You need to work out how much you’d like to cut off from the bottom of your dress. It’s a good idea to put the dress on and stand in front of a mirror. Turn the bottom hem line up, tuck it under and use a couple of pins to gauge where you want your hemline to finish. Mine is just below the knee.
If you notice the picture on the left; I have laid a ruler across the amount of fabric I want to cut off, which is 8cm. However, you have to take into consideration that you will need another 2cm turned up for stitching, and another 2 cm for using Wonderweb (which I’ll demonstrate a bit further on). So in total, I am removing 12cm. Measure yours accordingly.
 Step 2. Next you need to use scissors and cut along the edge of the fold at the bottom. Cut to where the first 2 or 3 pins end, remember my measurement was 8cm. At first you’re only cutting along a small section that’s been measured.
 Step 3. You then fold this piece, that’s been cut, backwards so that it’s adjacent to the edge of the hem running along the bottom that you’ve started cutting. If you look at the picture you can see what I mean. You are using this as a guide as you continually cut all the way around the bottom of your dress/skirt. Please take your time, and make sure the material is flat and level with the edge as you cut. Look at the next picture….
 As you can see, I have effectively rolled the fabric back as I’ve cut. As I neared the end, it gave me a neat bottom edge that’s level all the way round. This saves you from measuring all of the dress around the whole of the hemline. However, if you’d rather do that, then feel free to.
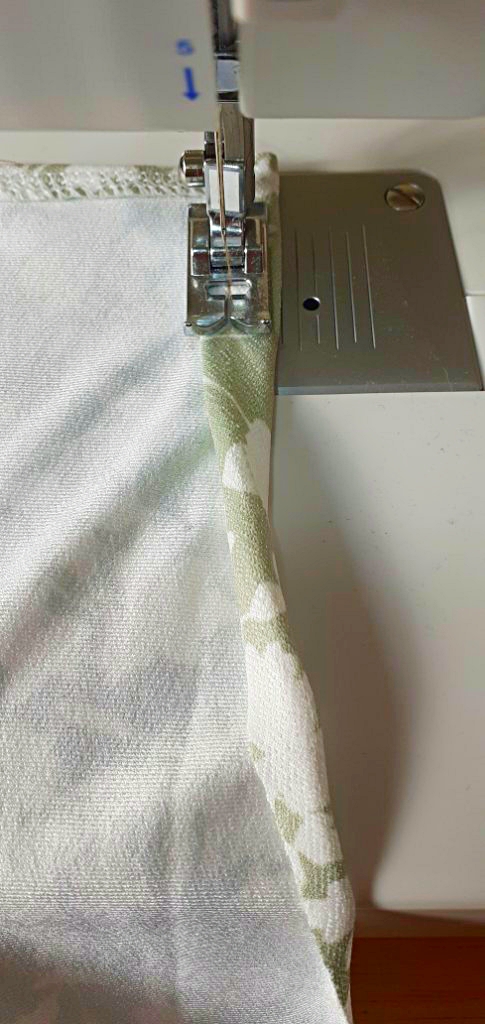 Step 4. Next is the stitching. I have a sewing machine; but you can stitch by hand too. I’ve taken this photograph to show you a good way to sew the hem. You fold the material from the bottom over about 1cm ,and them fold it over again 1cm. This will give you a closed-in hem to stitch. You don’t want the fabric to fray, which it will after a while, so this is a good technique to use. Very slowly, taking lots of time, fold the fabric over twice as you go, until you’ve reached the end.
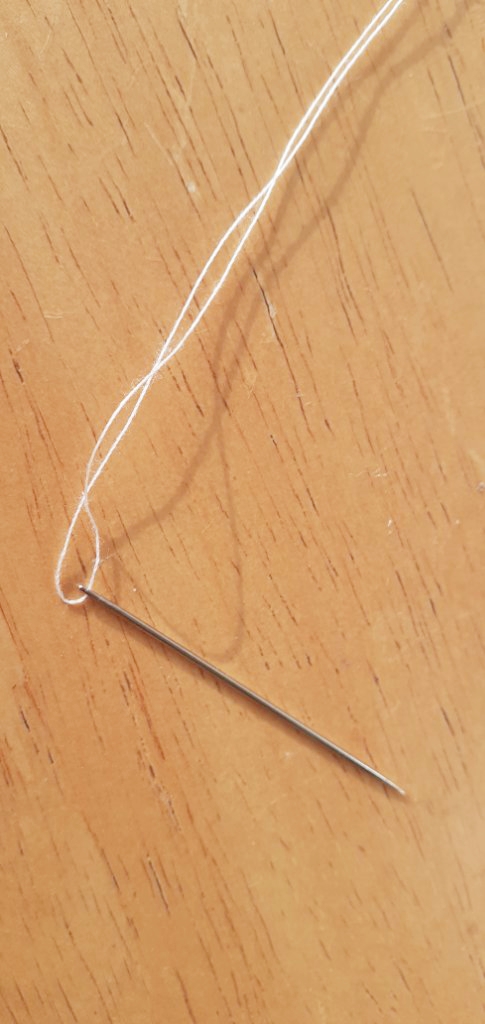 If you want to hand stitch. Thread a needle and make the cotton double like the picture shows you, then tie a knot at the end.
  Have a look at the way I’ve put the needle into the material. You need to fold the material as explained above, then you start off making a couple of stitches. Then, you’ll notice the way the needle in the picture goes into the fabric. The best way to describe it, is that you’re pushing the needle in, bringing it out, and then going backwards on itself, and then going a bit farther forward each time as you move along. If this is too complicated, just stitch by pushing the needle into the fabric so it comes out the back, then push it forward towards you, and repeat.
This next tip is very useful when it comes to using a fabric that isn’t cotton. My dress is made of majority Polyester and Elastine. When using a sewing machine, this can have a pulling effect as the foot moves along as the needle stitches. 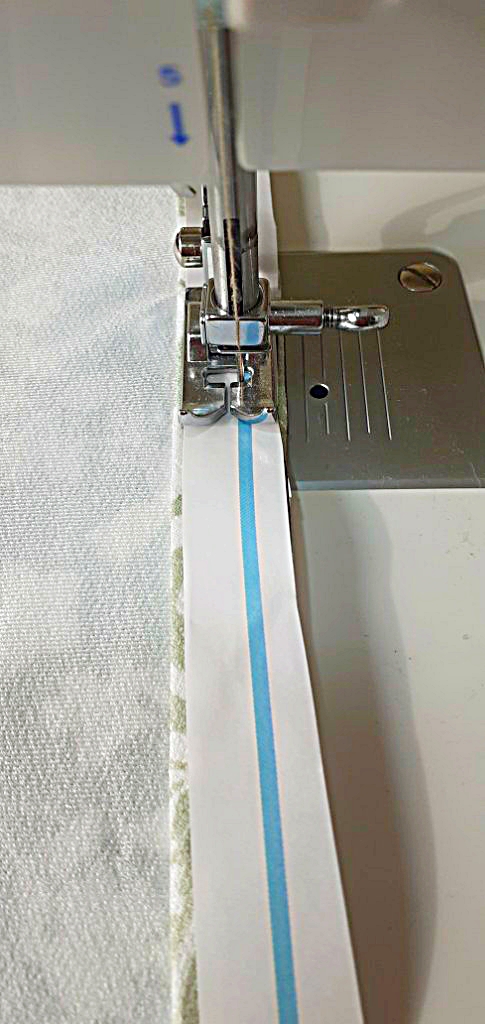 This is a pain, because it can cause the material to gather, something that you definitely don’t want!
But I have this brilliant remedy for it of my own invention. Cut strips of thin paper from a newspaper or a magazine, and place these under the foot. As the machine stitches along over the material and your folded hem, it will not gather and give you a straight, smooth stitch. When you’ve reached the end and taken the material out, just pull the paper away.
 The next thing you’ll need is a brilliant product called ‘Hemming web’ or ‘Wonder web’. I have two brands here, and they are both good to use. It’s made of a very thin material tape, that has a kind of glue attached to it. You cut the lengths that you need and iron them onto your hem. Look at the picture.
 Step 5. You have now sewed up the hem of your dress. It’s up to you whether you leave it as it is, with the stitching showing (remember if you do this, you will only need an extra 2cm on your finished length of hem to take up),which is fine, or you use this amazing stuff called ‘Wonder web’. If you look closely at the picture you will see how I have laid the web along and just below the stitched hemline.
You now put your iron on a medium setting, and get something like a pillowcase/old piece of material, that you run under the tap. You need to get this wet and wring it out so that it’s damp. You then fold sections of the hem over the Wonderweb, so that the material is covering it, (your last 2cm). You then place the damp pillowcase/piece of old fabric on the top and using your iron, press over it. Your iron will emit steam, (of course it will!). You run the iron over a few times and remove. Take off the pillowcase and you’ll notice that the material has stuck fast. Carry on all the way around the hem.

This stuff is amazing, because it gives you an edge that is seamless and that stands up to countless washes.
Some people say that “If you use the ‘Wonderweb, then what’s the point in stitching a hem?”. Well you do, because the sewing secures the fabric and stops it fraying.
 The Finished Dress! 🙂
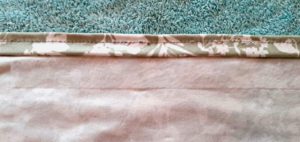
PS…This is a photo of a skirt that I altered the other week. It was made of cotton and the stitching ran smooth and I was happy with the look of it. I didn’t use Wonderweb with this. Ultimately, it’s your choice on how happy you are with your finished garment. I wanted to show what options are available to you. I hope you’ve enjoyed reading this article.
Take care x Pip
Pip
I am a mother of two children, and have had many experiences in my life that I have been through and had to overcome. I feel it would be beneficial (at least to me, and perhaps you) to share my experiences. I’d love to hear your comments and suggestions. x
